September 23, 2020
2min Read
Paulius Z.
If you’re already comfortable with our email hosting services, you might want to consider moving your messages from your old email account to Hostinger.
Your business deserves the finest email hosting services. Considering picking up Hostinger.
In this guide, we’ll go through each step of migrating an existing email account to Hostinger.
1. Install the Email Client
First, you need an email client to transfer your old account messages to the new one.
An email client is a desktop application that lets you manage multiple mailboxes simultaneously. You may already have one pre-installed on your computer – for example, Apple Mail for macOS or the Mail and Calendar app for Windows.
However, there are other alternatives you can use:
Once you’ve made your choice, download and install the application. In this article, we’ll be using Thunderbird as an example.
2. Set Up Your Accounts
Before using the client, sign in to your Hostinger account to create a new email address:
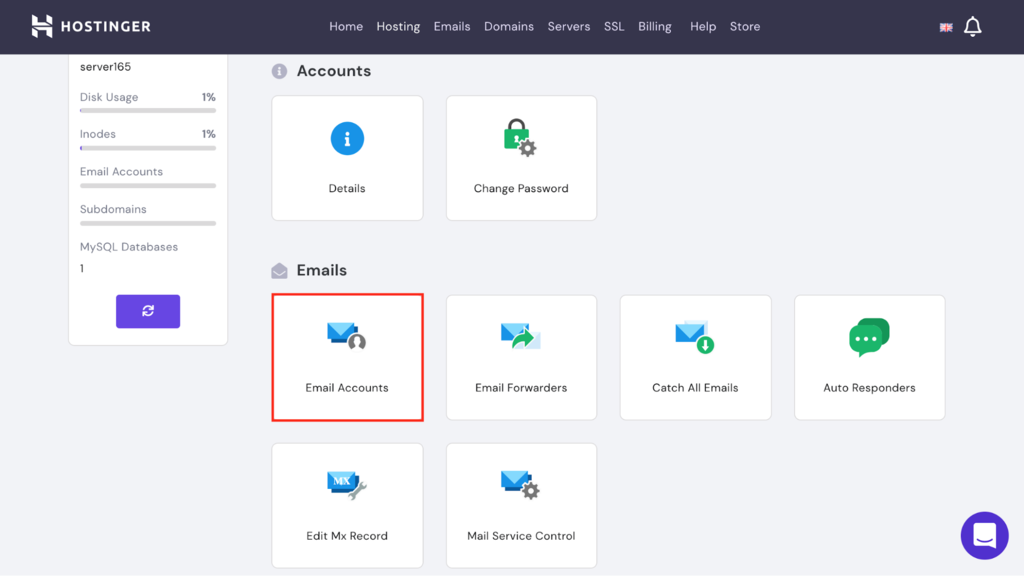
- Head over to the hPanel. Click Email Accounts under the Emails section.
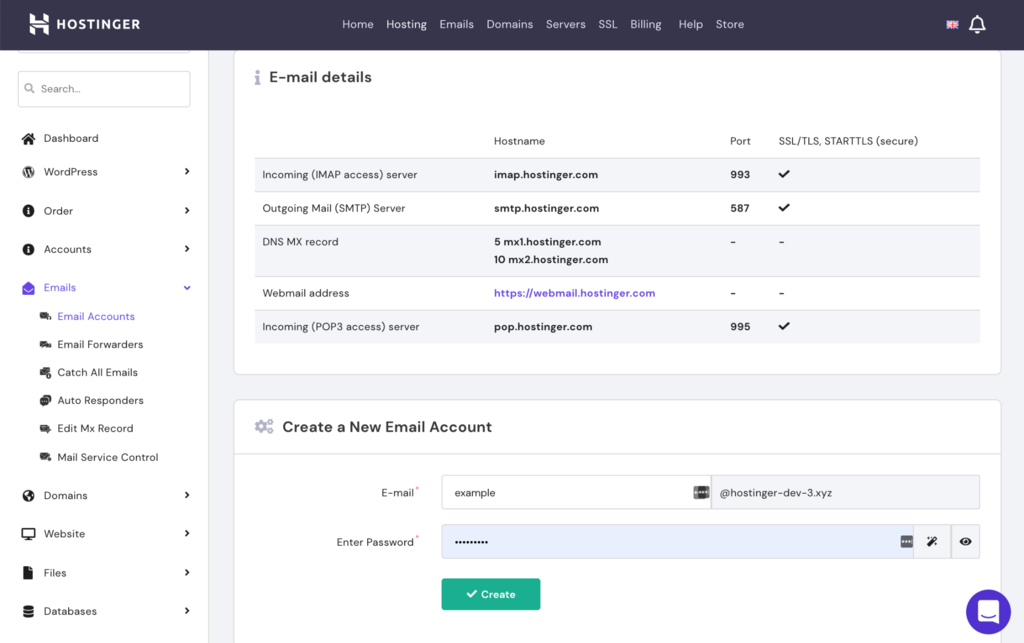
- Scroll down to the Create a New Email Account section and fill in the required fields. Once that’s done, click Create.
- Keep this window open. We’ll use the information to set up your email client during the next step.
For more information about mail protocols and their use, you can read our article here. Now, open up the email client and follow the instructions below.
NOTE: While we are using Thunderbird for this example, the overall process of setting up an email account is similar for all email clients.
- Connect the email app to your new email account. From the home screen, click Email. Alternatively, you also hit the triple bar icon on the very top-right corner and select Account Settings, then from the bottom-left, click Account Actions and Add Mail Account.

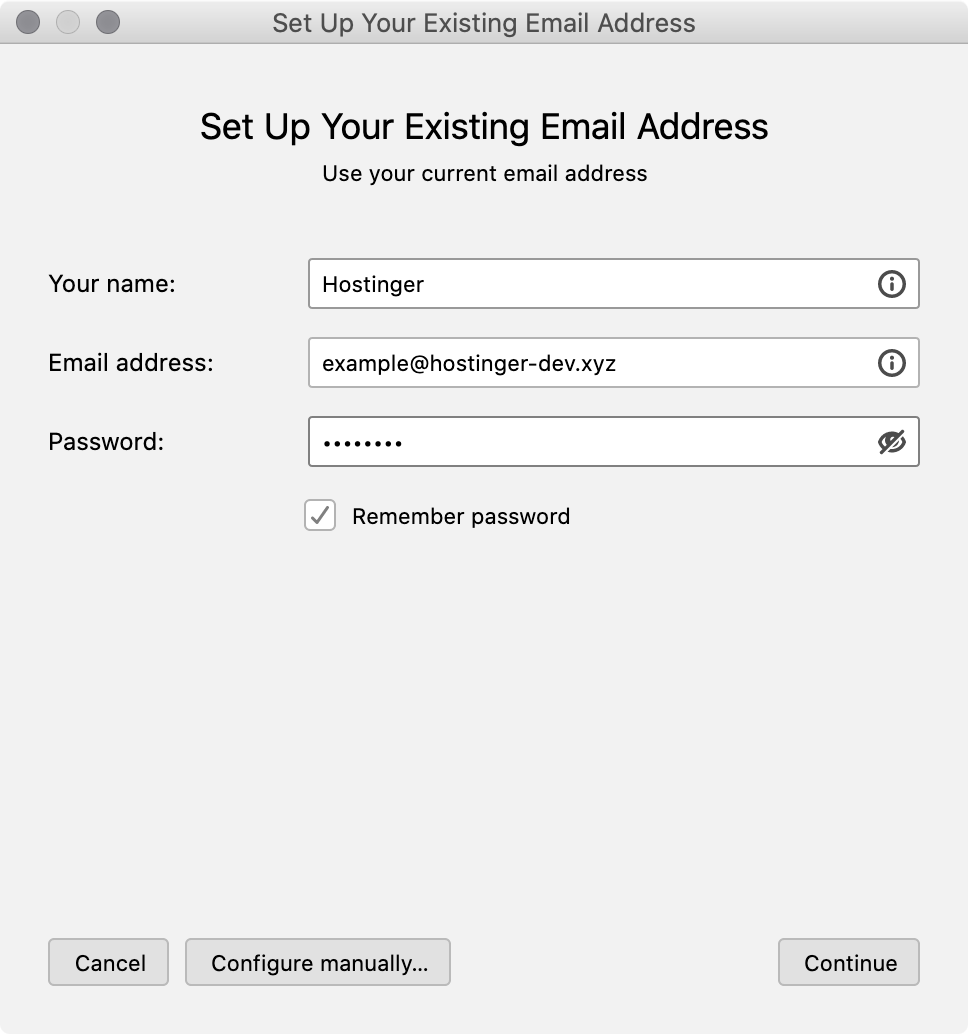
- Fill in your name, email address, and password. Then, hit the Configure manually button.
- Replace the information for the Incoming and Outgoing Server fields with the email details from before:
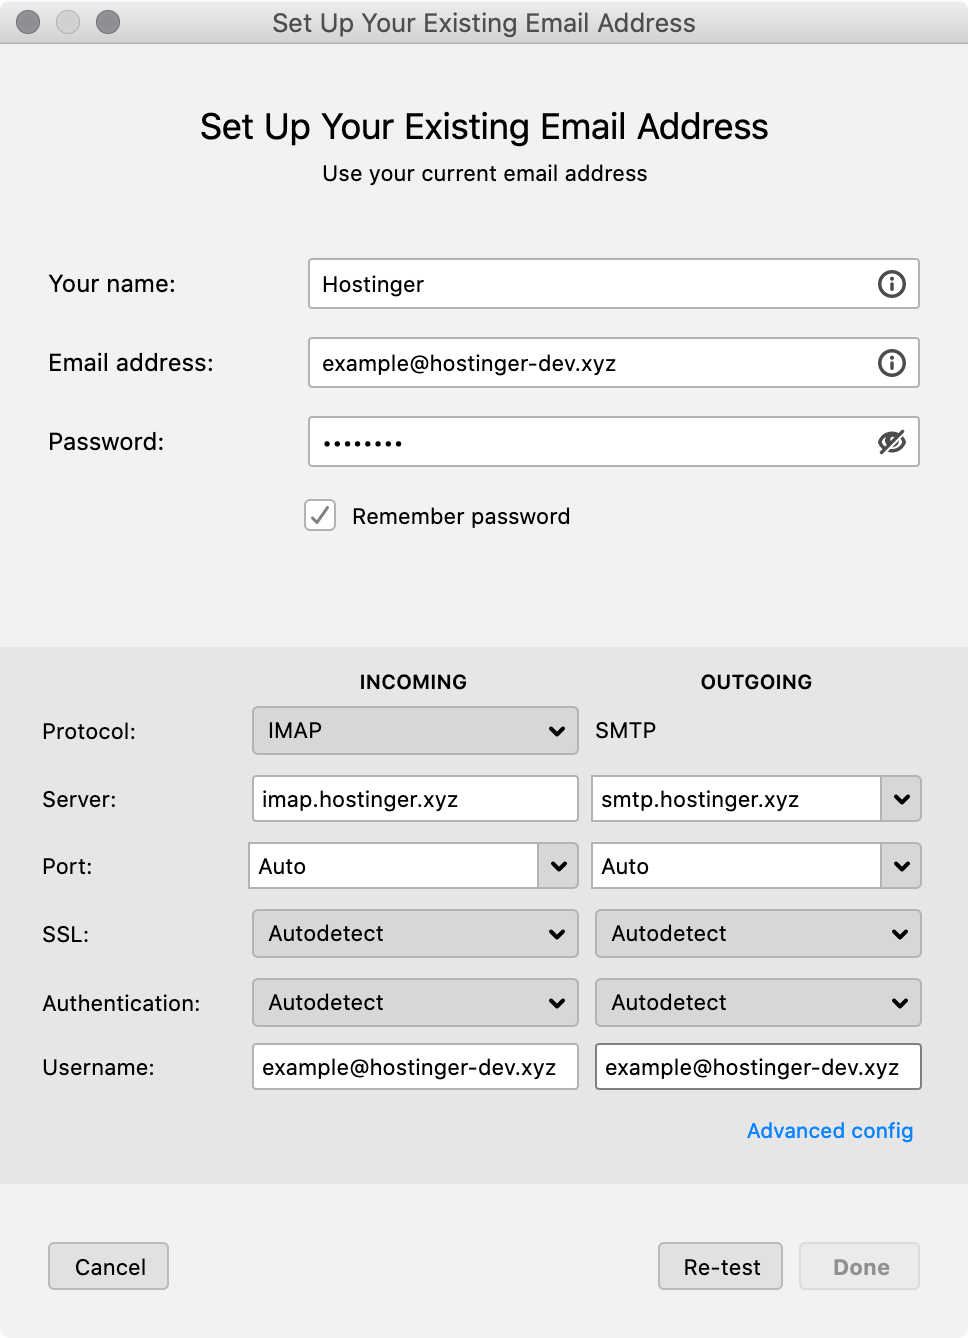
- Click the Re-test button and let the application collect the rest of the information automatically. If successful, press Done.
- Repeat the previous steps from start to finish for all of your other previous email accounts.
3. Transfer Your Messages Between Accounts
Here’s how to transfer your messages between each account:
- Select the messages you want to transfer.
- Right-click on the selections. Go to Move To and select your new email account. Pick the folder for relocating the messages.
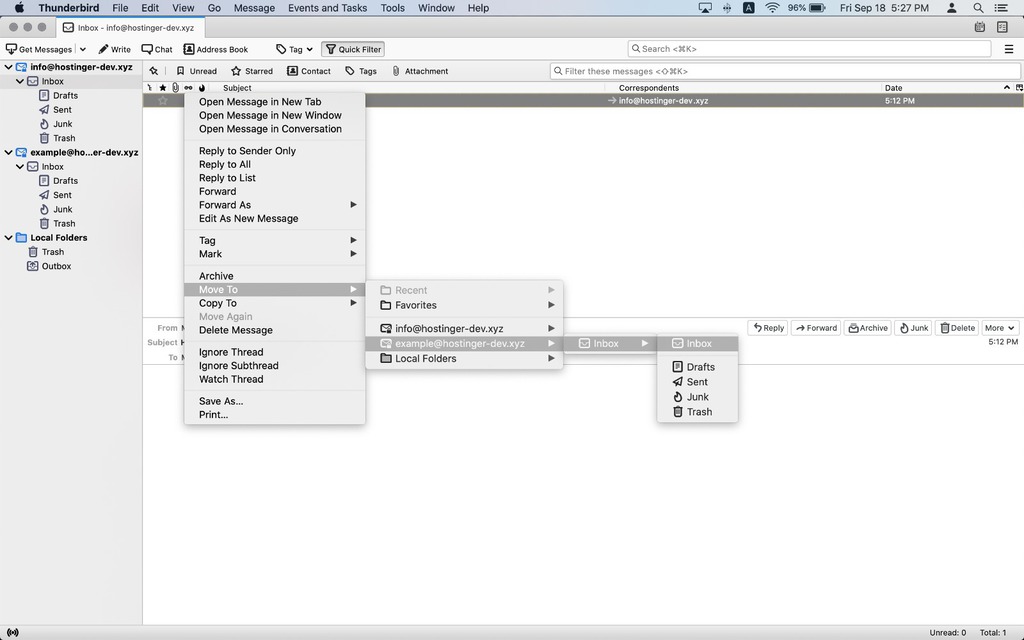
- Let the email client complete the transfer. Do not close the application until all the messages have been moved.
If the email sizes are rather large and the transfer process takes too much time, the IMAP connection can time out. To mitigate this, you can move the messages into smaller batches.
Conclusion
Congratulations, you have successfully moved email messages from your old account to Hostinger.
We hope this article has been helpful. Let us know if you have any further questions.